DP GROUP, founded in 2016, offer professional laser solutions and sheet metal fabrication machinery. Headquartered in Hong Kong, we operate three factories in mainland China:
DPMach (Dongguan): Specializes in laser cutting, welding, and marking.
DGDY (Dongguan): Focuses on press brake machines with advanced Panel Bender technology.
DPQG (Foshan): Manufactures large tube laser cutting machines for pipes up to 800mm in diameter and 30 meters lenth.
Availability: | |
---|---|
Quantity: | |
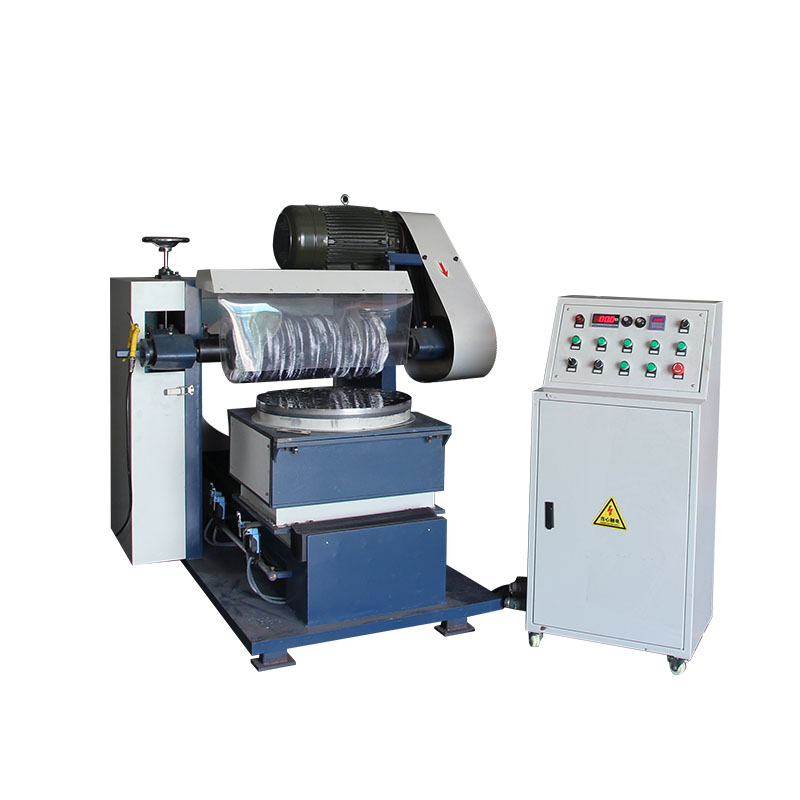
PM660
This equipment is designed for metal polishing. During operation, the workpiece is placed on the worktable, which moves forward and backward via motor drive while simultaneously swaying left and right through an eccentric mechanism. The polishing head is positioned by a cylinder with manual compensation. The machine features a compact structure, stable polishing process, low noise, and high efficiency.
Warranty: One year for the main unit (excludes accessories and consumables).
Conditions: Free repair for non-human-induced damage or non-natural disasters. On-site services incur labor and travel fees.
Prohibition: Customers must not disassemble, modify, or replace parts independently to avoid serious consequences.
Place the machine in a well-ventilated area with ≥50 cm clearance from walls/objects. Keep flammable materials ≥5 m away.
The control box must be positioned ≥50 cm from the machine. Power cables must not drag on the floor; use insulated conduits for ground wiring.
Ensure reliable grounding and wear protective clothing and masks.
Use a three-phase leakage protection switch for power supply. Disconnect during thunderstorms or idle periods. Power cables ≥6 mm².
Parameter | Specification |
---|---|
Main Motor | 7.5KW/11KW (optional) |
Control | PLC |
Air Pressure | 4 PA |
Compensation | Manual (optional) |
Sway Stroke | 50mm (adjustable) |
Spindle Speed | Adjustable/non-adjustable (optional) |
Alarm System | Included |
Feed Speed | Adjustable/non-adjustable (optional) |
Total Power | 9-12KW |
Worktable | 600×600mm (disc diameter: 550mm) |
Abrasive Diameter | Ø250mm |
Machine Dimensions | 1450×1500×1600mm |
Switches: Four limit switches (front extreme, front limit, rear limit, rear extreme).
Operation:
The front limit serves as the origin. After activation, the table moves forward until contacting the rear limit, then reverses.
Extreme switches act as safety backups if primary limits fail.
Adjustment: Stop the machine and press the emergency stop before adjusting sway distance via the screw slot.
Lubrication:
Apply grease weekly to gears, racks, and handwheel升降 parts.
Lubricate oil nozzles every 15 working days.
Add guide oil (GB/T314-1994) to linear bearings every 15 working days.
Power Indicator: Lights up when powered.
Work Indicator: Activates during operation.
Emergency Stop/Limit (PLC Light): Stops all functions; requires reset after activation.
Manual Compensation: Adjust via handwheel as the wheel wears.
Stepper Motor Compensation: Automated adjustment via stepper motor.
Read the manual thoroughly and verify power voltage compatibility.
Ensure proper grounding to prevent electric shock.
Positioning: Align the wheel slightly beyond the workpiece edge (10 mm offset).
Set Limits: Fix forward/rear limit switches based on wheel coverage.
Contact Adjustment: Lower the wheel to contact the workpiece surface.
Reset & Set Counts: Reset the system and set polishing cycles (default: 6 cycles).
Current Adjustment: Monitor ammeter and adjust pressure:
Stainless steel: 18-21A
Zinc alloy: 15-18A
Copper: 12-16A
Production: Start production with sway enabled and manual waxing.
Similar to manual steps but controlled via touchscreen.
Use the emergency stop for halts; reset to restart.
Disconnect power during thunderstorms or inactivity.
Secure the machine to the ground to prevent movement.
Ensure cable connectors are tightly fastened with copper sleeves.
Environment: Dry, dust-free, no direct sunlight, temperature -10~40°C, no vibrations/corrosive gases.
Place the workpiece on the worktable.
Start the spindle and ensure clockwise rotation (reverse motor wires if needed).
Use manual mode to position the workpiece under the wheel.
Lower the wheel to contact the surface.
Set travel limits via limit switches based on workpiece length. Switch to auto mode and reset.
Start automatic operation and fine-tune via handwheel for optimal results.
Wait for the work light to turn off before removing the workpiece.
Power off, clean the machine, and lubricate moving parts regularly.
Unstable Sway/Noise: Tighten screws and lubricate bearings.
Poor Polishing Quality: Adjust conveyor speed or resurface the polishing wheel.
Consult the manufacturer for PLC-related problems.
Confirm wheel rotation direction before startup.
Stop immediately for abnormal noises or behaviors.
Contact the supplier for unresolved issues.
Lubricate the spindle and guides regularly.
Check and tighten screws after 8-10 hours of operation.
Clean daily with filtered compressed air.
Lubricate friction points (sliders, rails) regularly.
Use dust extraction during cleaning.
Check and clean the air filter daily.
content is empty!